Creating Your First Agent
1
Navigate to Custom Agents
Go to julius.ai/custom-agents or click Custom Agents in your sidebar menu, then click Create Agent.
2
Name Your Agent
Give your agent a descriptive name that reflects its purpose (e.g., “Marketing Analytics Expert” or “Financial Reporting Assistant”).
3
Configure Your Agent
Fill in the configuration fields to customize how your agent behaves and what it knows.
How Custom Agents Work
When you configure a custom agent, you’re building a specialized assistant that works within Julius’s context window. Here’s how all the pieces fit together: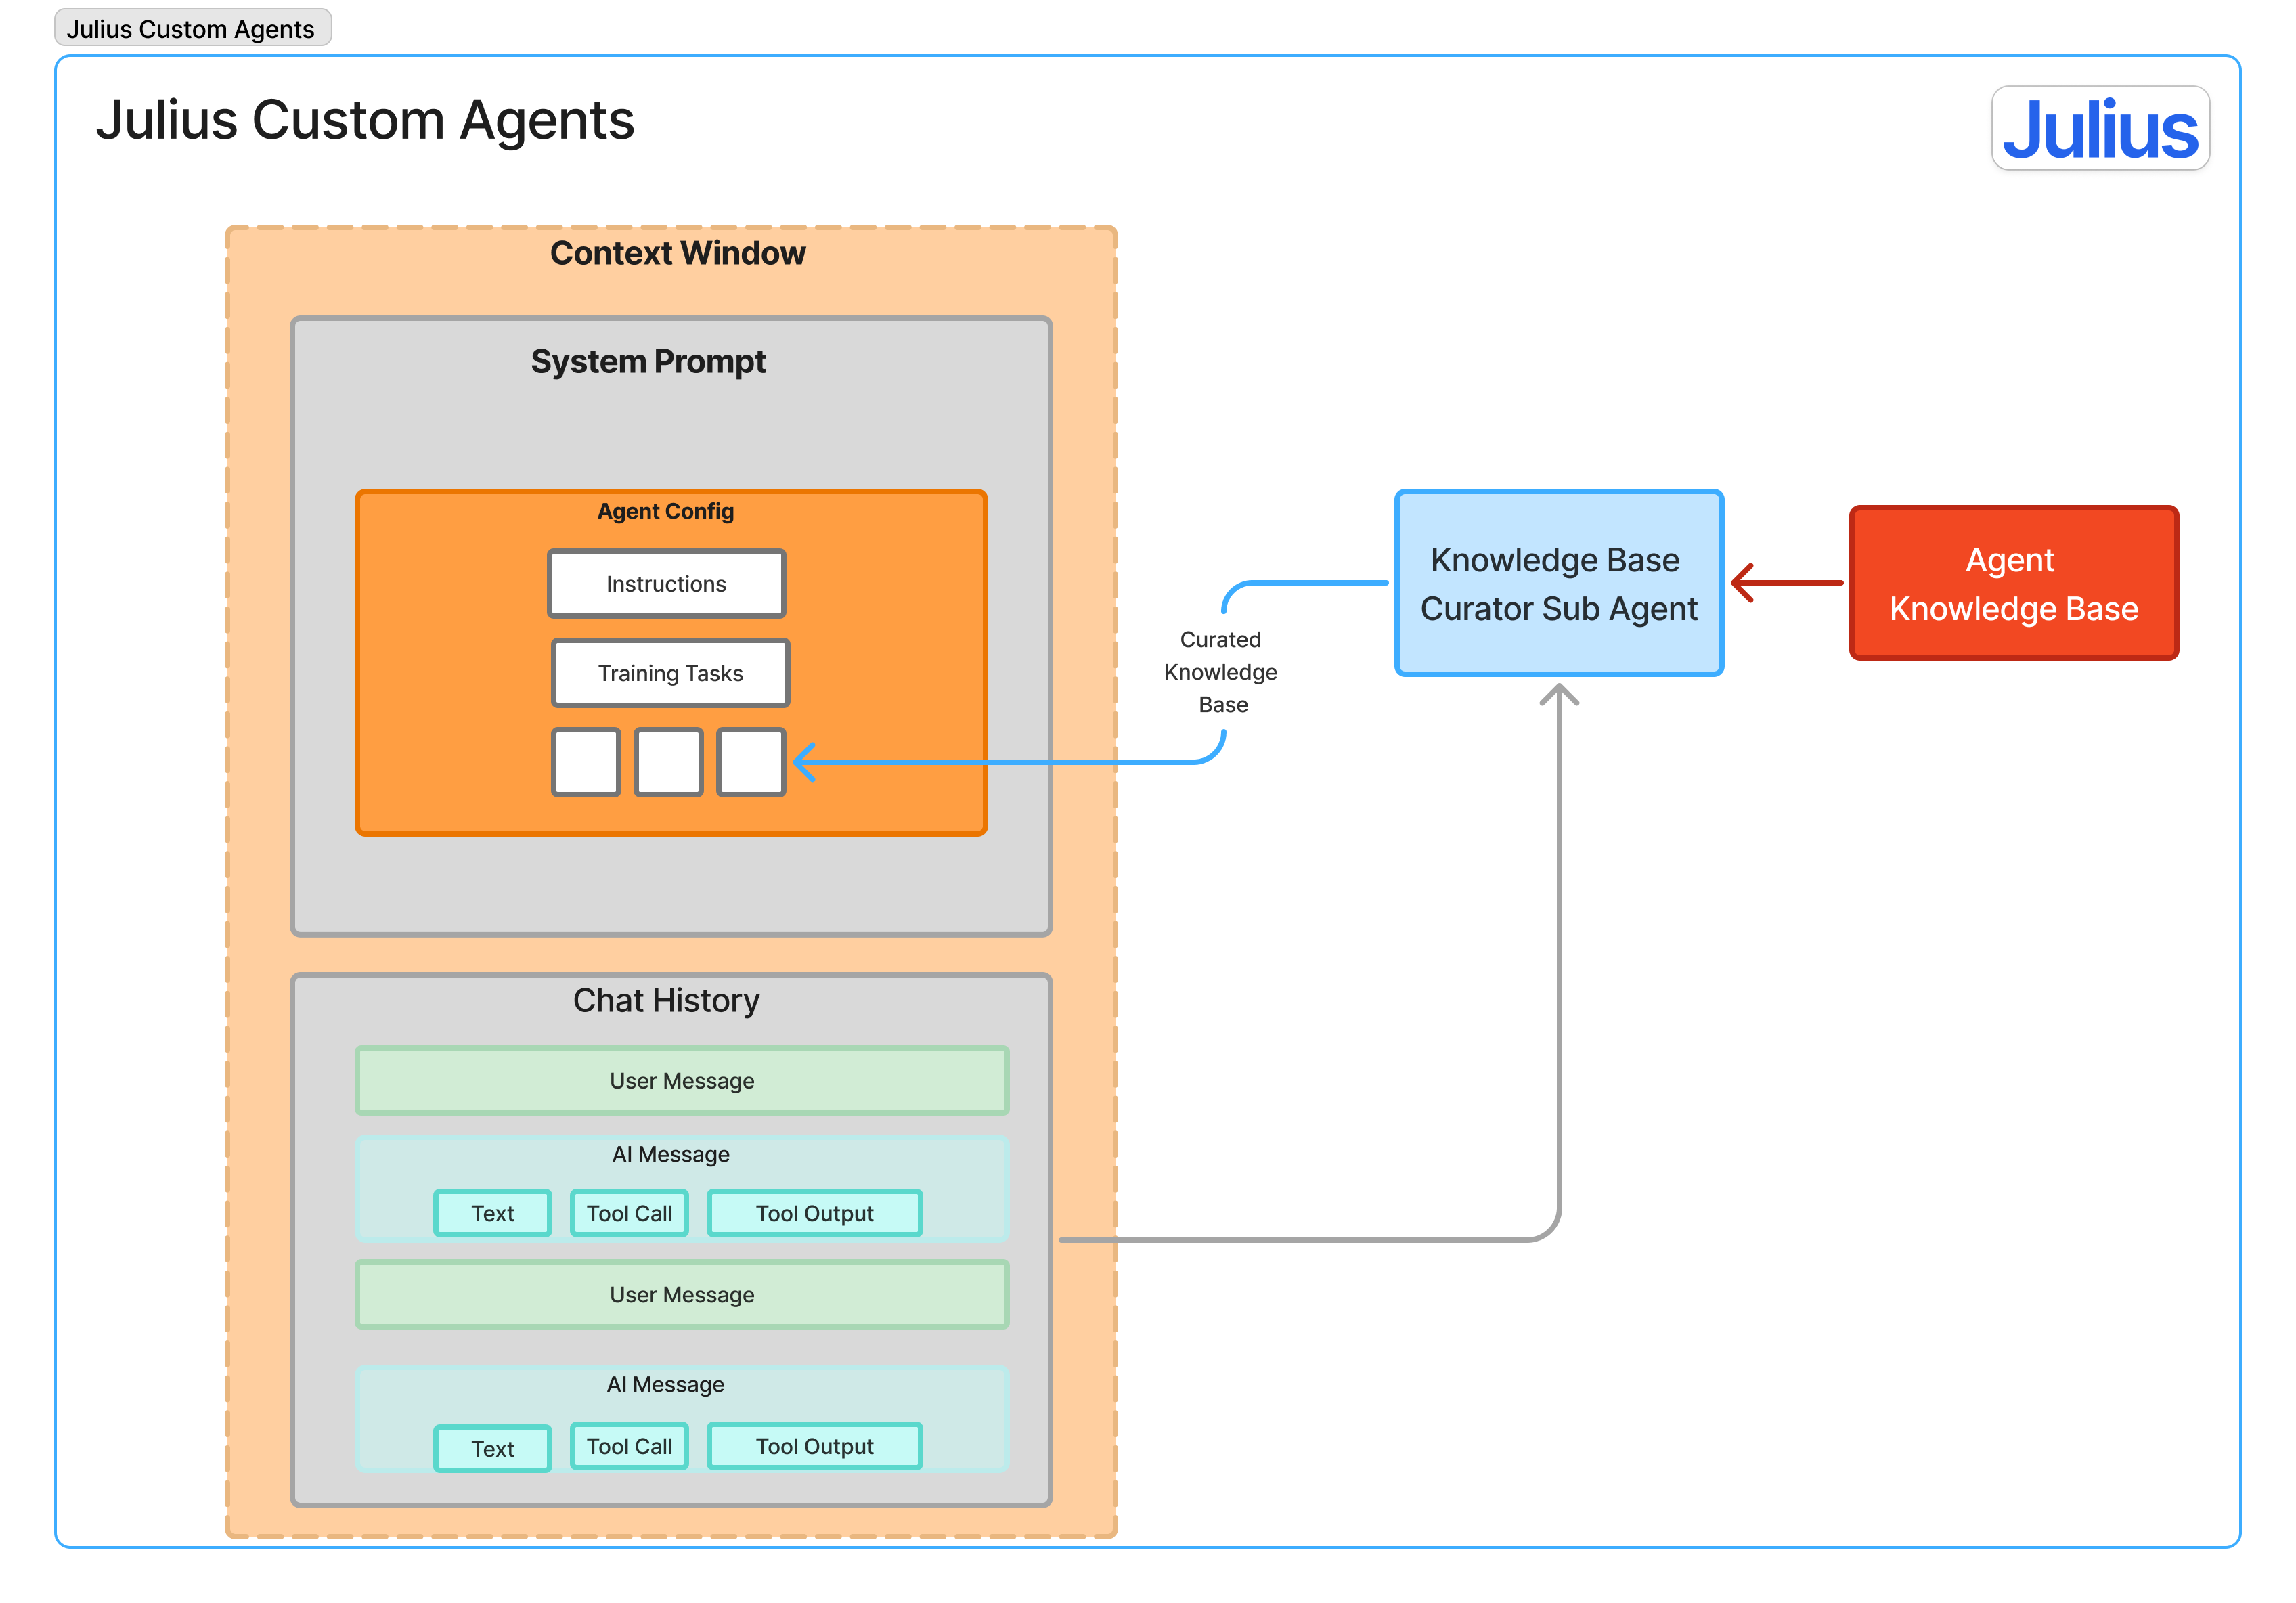
- System Prompt: Your instructions, training tasks, and curated knowledge
- Chat History: Your ongoing conversation context
- All of Julius’s standard capabilities (code execution, visualizations, data analysis, etc.)
Configuration Options
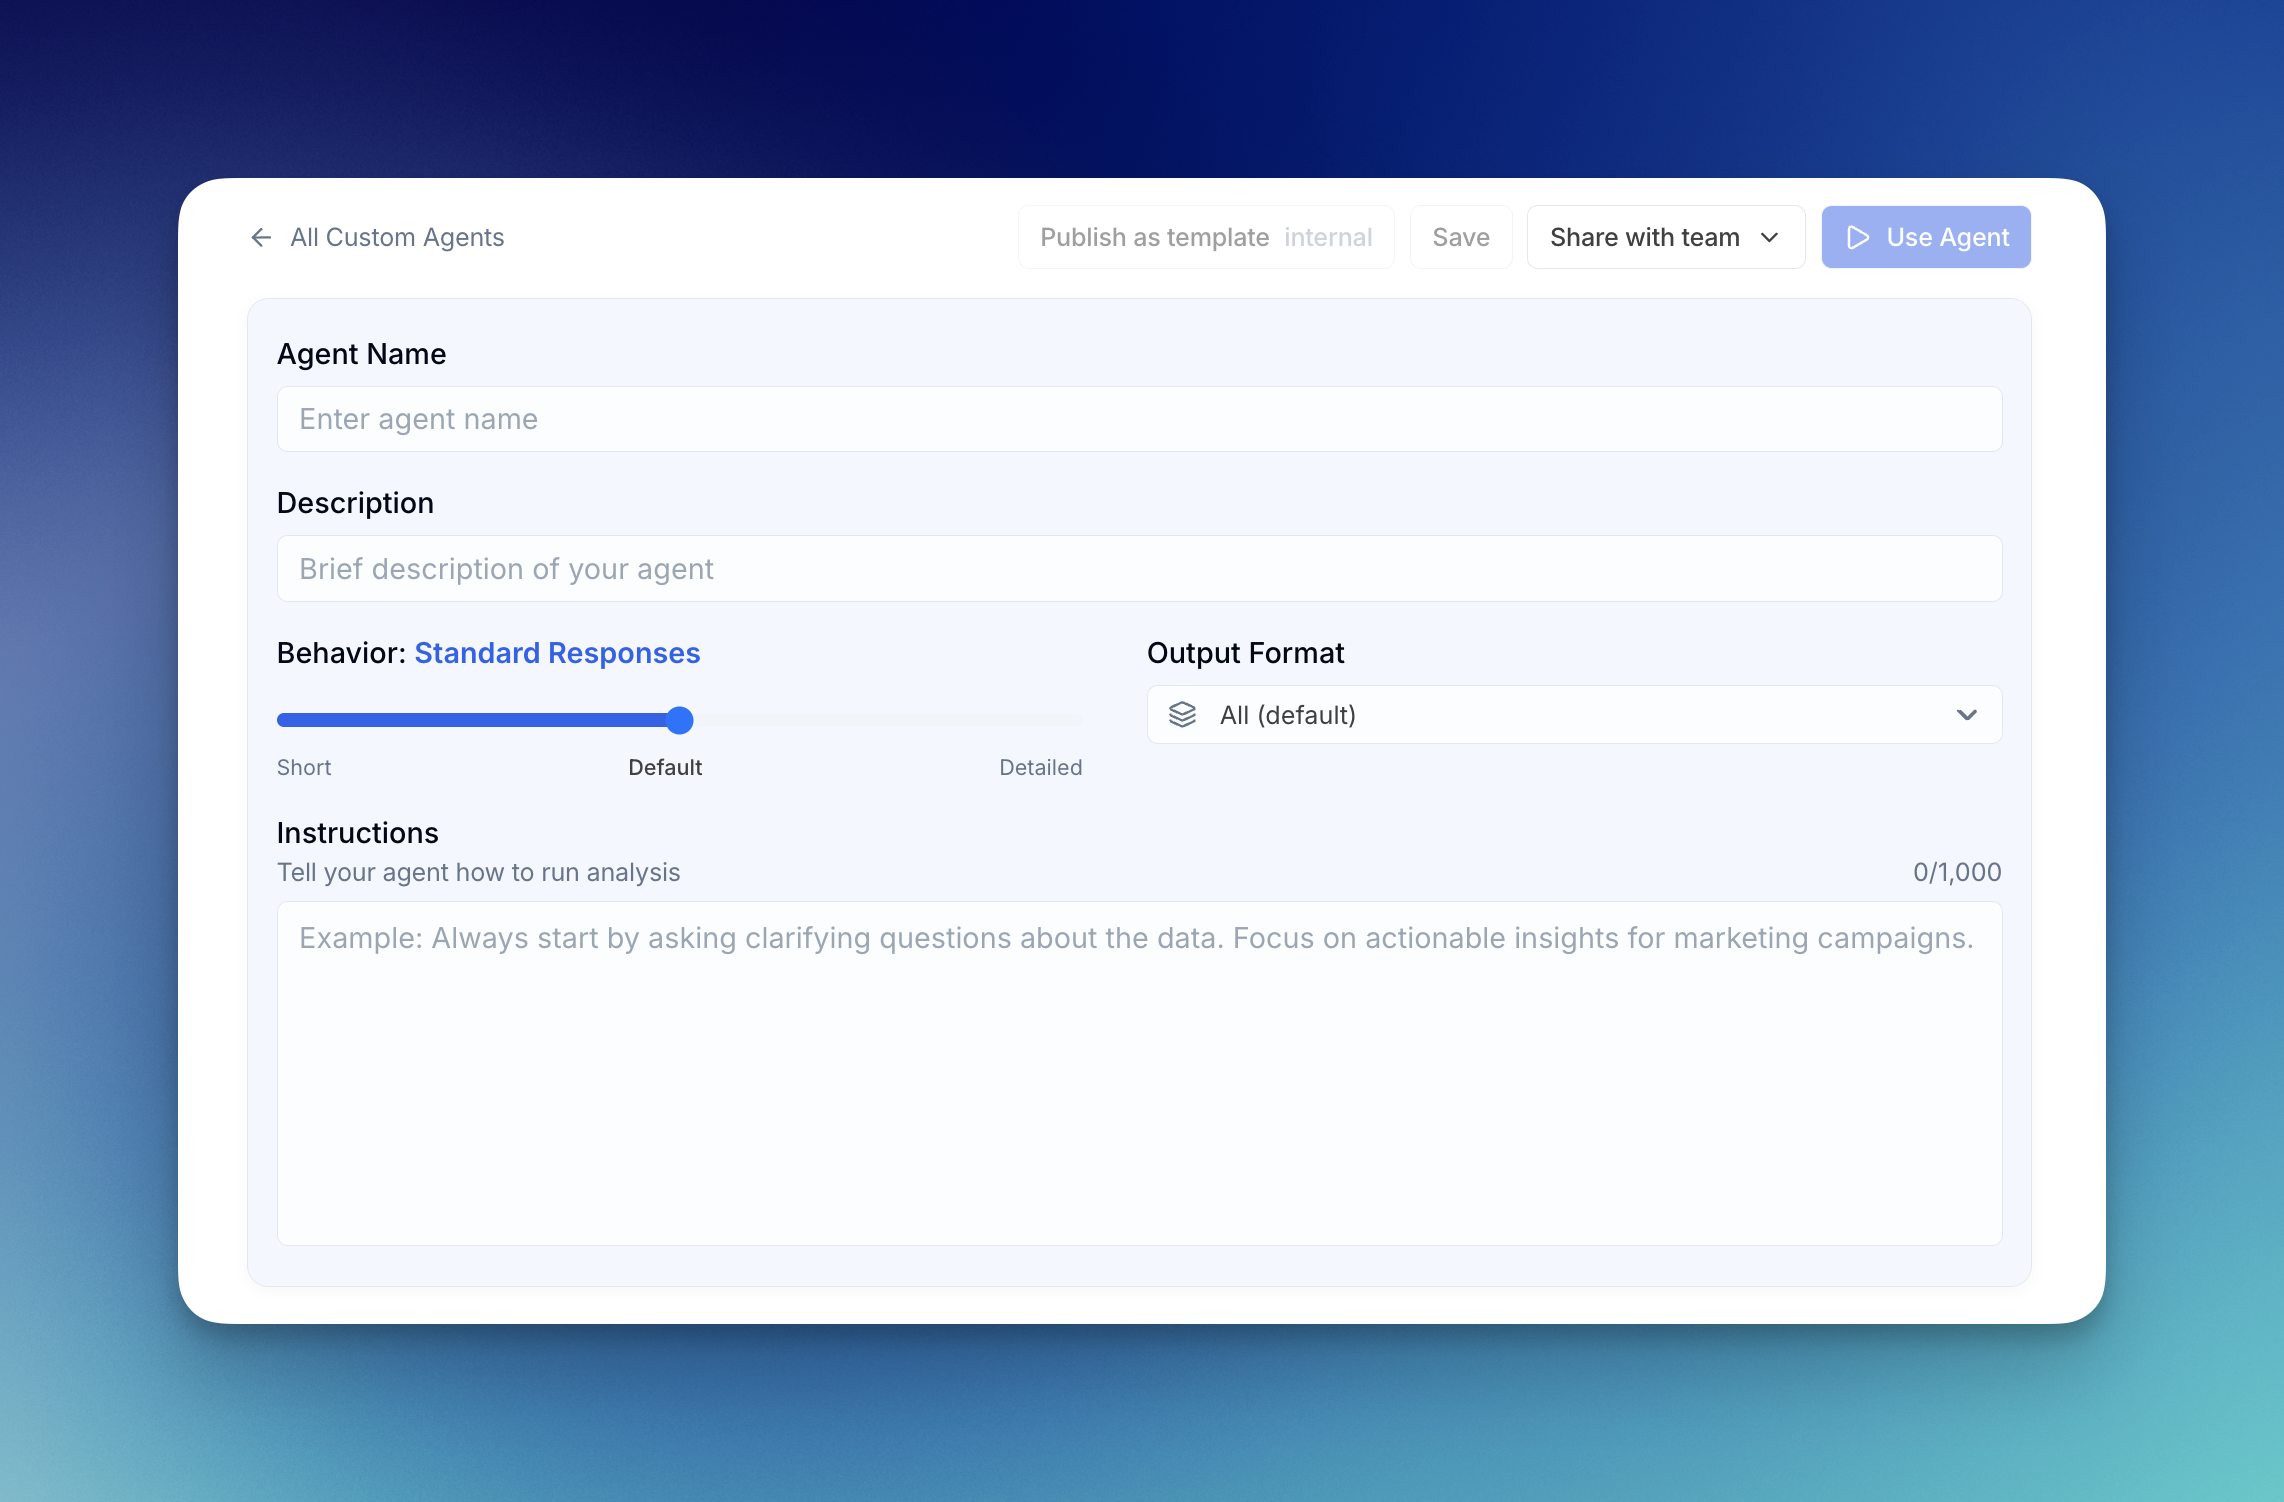
Agent Name & Description
Agent Name: Choose a clear, descriptive name for your agent. Description: Write a brief description that explains what your agent does. This helps you and your team quickly identify the right agent for the task.Behavior Settings
Control how your agent responds with the behavior slider:- Short: Concise, to-the-point responses
- Standard (Default): Balanced responses with appropriate detail
- Detailed: Comprehensive responses with thorough explanations
Output Format
Choose what type of output your agent prioritizes:- All (default): Balanced approach to all output types
- Visualizations First: Prioritizes creating charts and graphs
- Files/DataFrames First: Focuses on data tables and exports
- Insights First: Emphasizes written analysis and takeaways
Instructions
Character Limit: 1,000 characters Instructions define your agent’s general methodology and approach to analysis. Think of this as your agent’s working philosophy that applies to every interaction. Example:Training Tasks & Approach
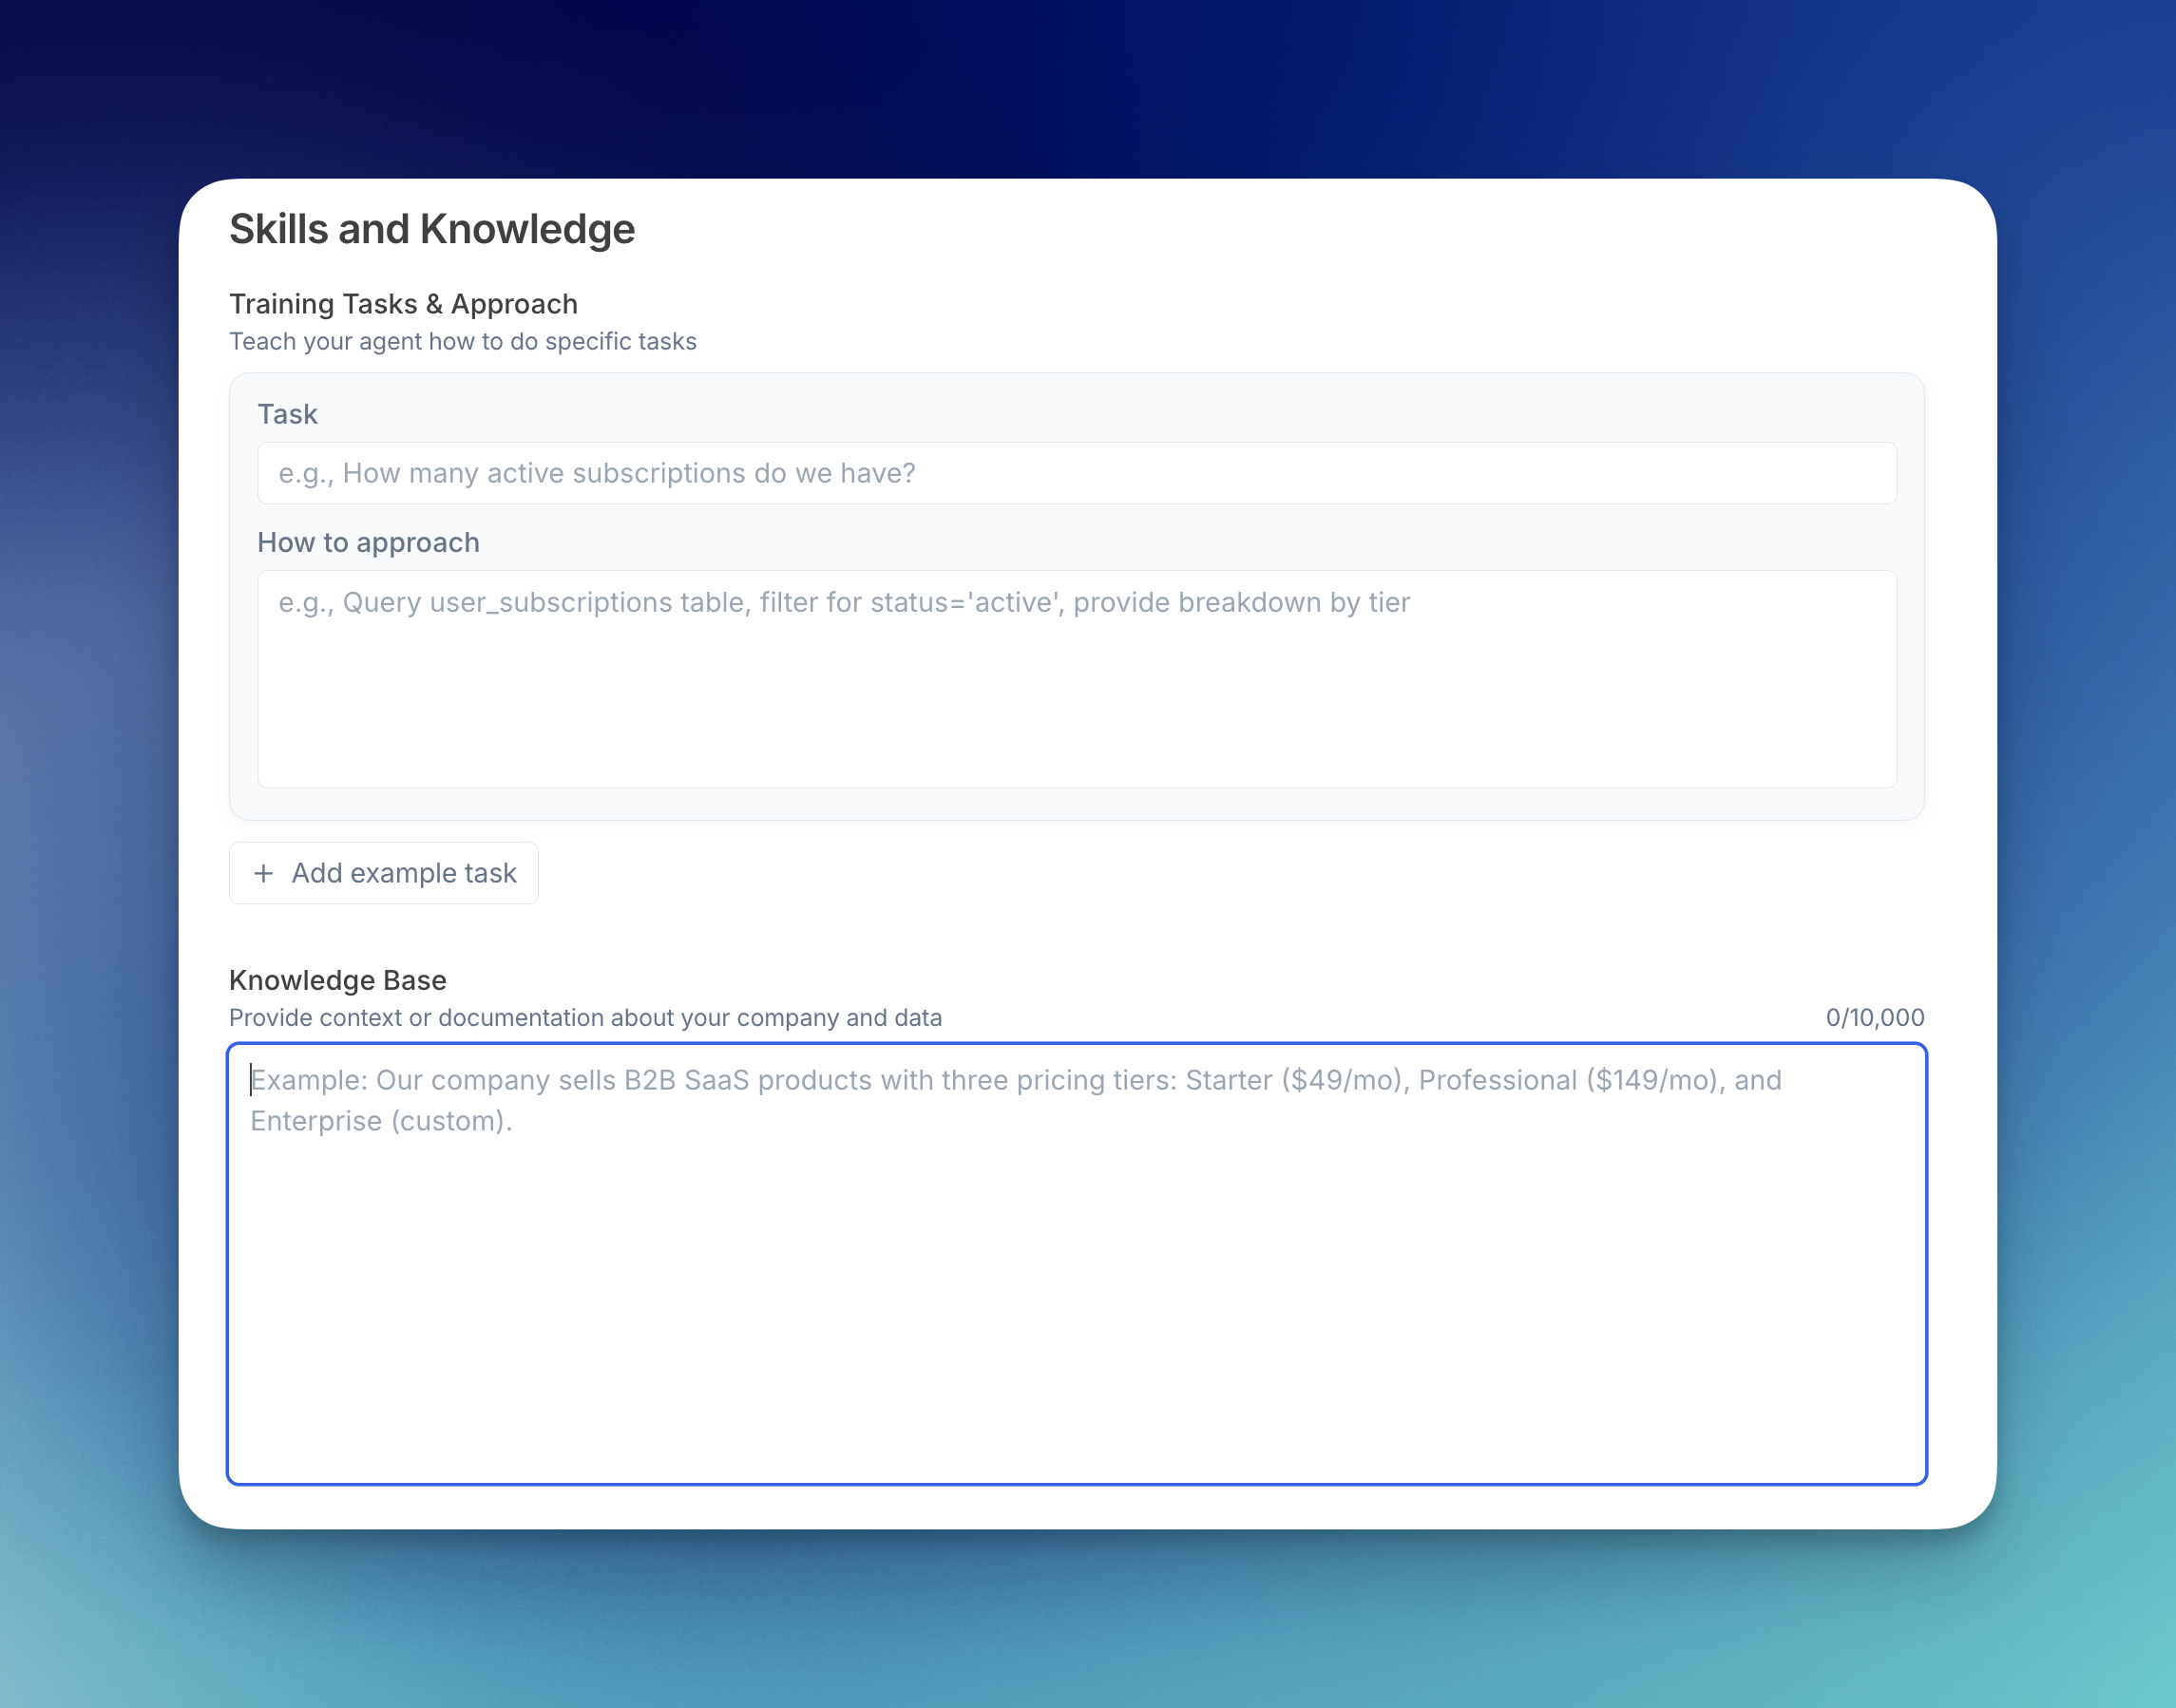
- Task: The question or request (e.g., “How many active subscriptions do we have?”)
- How to approach: Step-by-step instructions for completing this task
- Ensures consistency on repeated tasks
- Teaches best practices to your agent
- Reduces the need for detailed instructions each time
- Great for onboarding team members to your analytical standards
Knowledge Base
Character Limit: 10,000 characters The knowledge base holds all the context about your company, data, and domain. You don’t need to reference it manually. When you ask a question, Julius reads through your knowledge base and pulls only the relevant information for that specific question. What to Include:- Company background and business model
- Data structure and key tables/fields
- Industry-specific terminology
- Important metrics and how they’re calculated
- Common data issues or quirks
- Relationships between different data sources
You can include up to 10,000 characters of context. Don’t worry about being too detailed - the automatic summarization ensures your agent only uses what’s relevant for each question.
Web Search
Toggle whether your agent can use web search to find current information beyond its training data. Useful for agents that need to reference current events, prices, or frequently changing information.Saving Your Agent
Once you’ve configured your agent:- Click Save to store your configuration
- Click Use Agent to activate it immediately and start a new chat
- Or click Share with Team to make it available to team members
Best Practices
Start Simple
Begin with basic instructions and a few training tasks. Add complexity as you understand what works.Be Specific
Vague instructions lead to inconsistent results. Clear, specific guidance helps your agent deliver exactly what you need.Use Real Examples
Base training tasks on actual questions you regularly ask. This ensures your agent handles real-world scenarios.Iterate and Improve
Monitor your agent’s performance and refine the configuration. Add new training tasks as you discover common patterns.Document Your Data
A well-maintained knowledge base makes a huge difference. Keep it updated as your data structure changes.Next Steps
Using Custom Agents
Learn how to activate and work with your agents
Sharing with Teams
Share your agents with team members